An Introduction to Angular Components
"Dumb" component: reusable Toolbar
The messaging app needs more functionality in the toolbar. We'll be adding that functionality using a reusable chunk of html and reference it in our views. This eliminates the need to write duplicate code for every view.
First let's create a components directory and a new toolbar directory with a toolbar.component.html file. Your directory structure should look like:
/src/components/toolbar/toolbar.component.html
Let's copy the inner html from our current toolbar and place it in our new toolbar.component.html file.
<span flex></span>
<a md-icon-button mdTooltip="Help"><md-icon>help</md-icon></a>
Create toolbar.component.ts with td-toolbar selector and reference our toolbar.component.html file
import { Component } from '@angular/core';

@Component({
  selector: 'td-toolbar',
  templateUrl: './toolbar.component.html',
})

export class ToolbarComponent {}
Let's import our toolbar component in app.module.ts and test out the toolbar component in overview.component.html
import { ToolbarComponent} from './components/toolbar/toolbar.component';
Then we add it as a declaration of our module, this is so our module recognizes what td-toolbar is
declarations: [
  ToolbarComponent
]
Replace the toolbar <div> and the icon / spacer span element inside it with our new <td-toolbar> component:
<td-toolbar td-toolbar-content flex layout="row"></td-toolbar
We can now add to our toolbar.component.html and test if it works in our other views. Let's add in another anchor with icon for a docs link:
<span flex></span>
<a md-icon-button mdTooltip="Docs"><md-icon>chrome_reader_mode</md-icon></a>
<a md-icon-button mdTooltip="Help"><md-icon>help</md-icon></a>
Then add our component to the systems.component.html view. It'll be the first element in <td-layout-nav>
<td-layout-nav logo="assets:teradata" toolbarTitle="Quickstart">
  <td-toolbar td-toolbar-content flex layout="row"></td-toolbar>
  ...
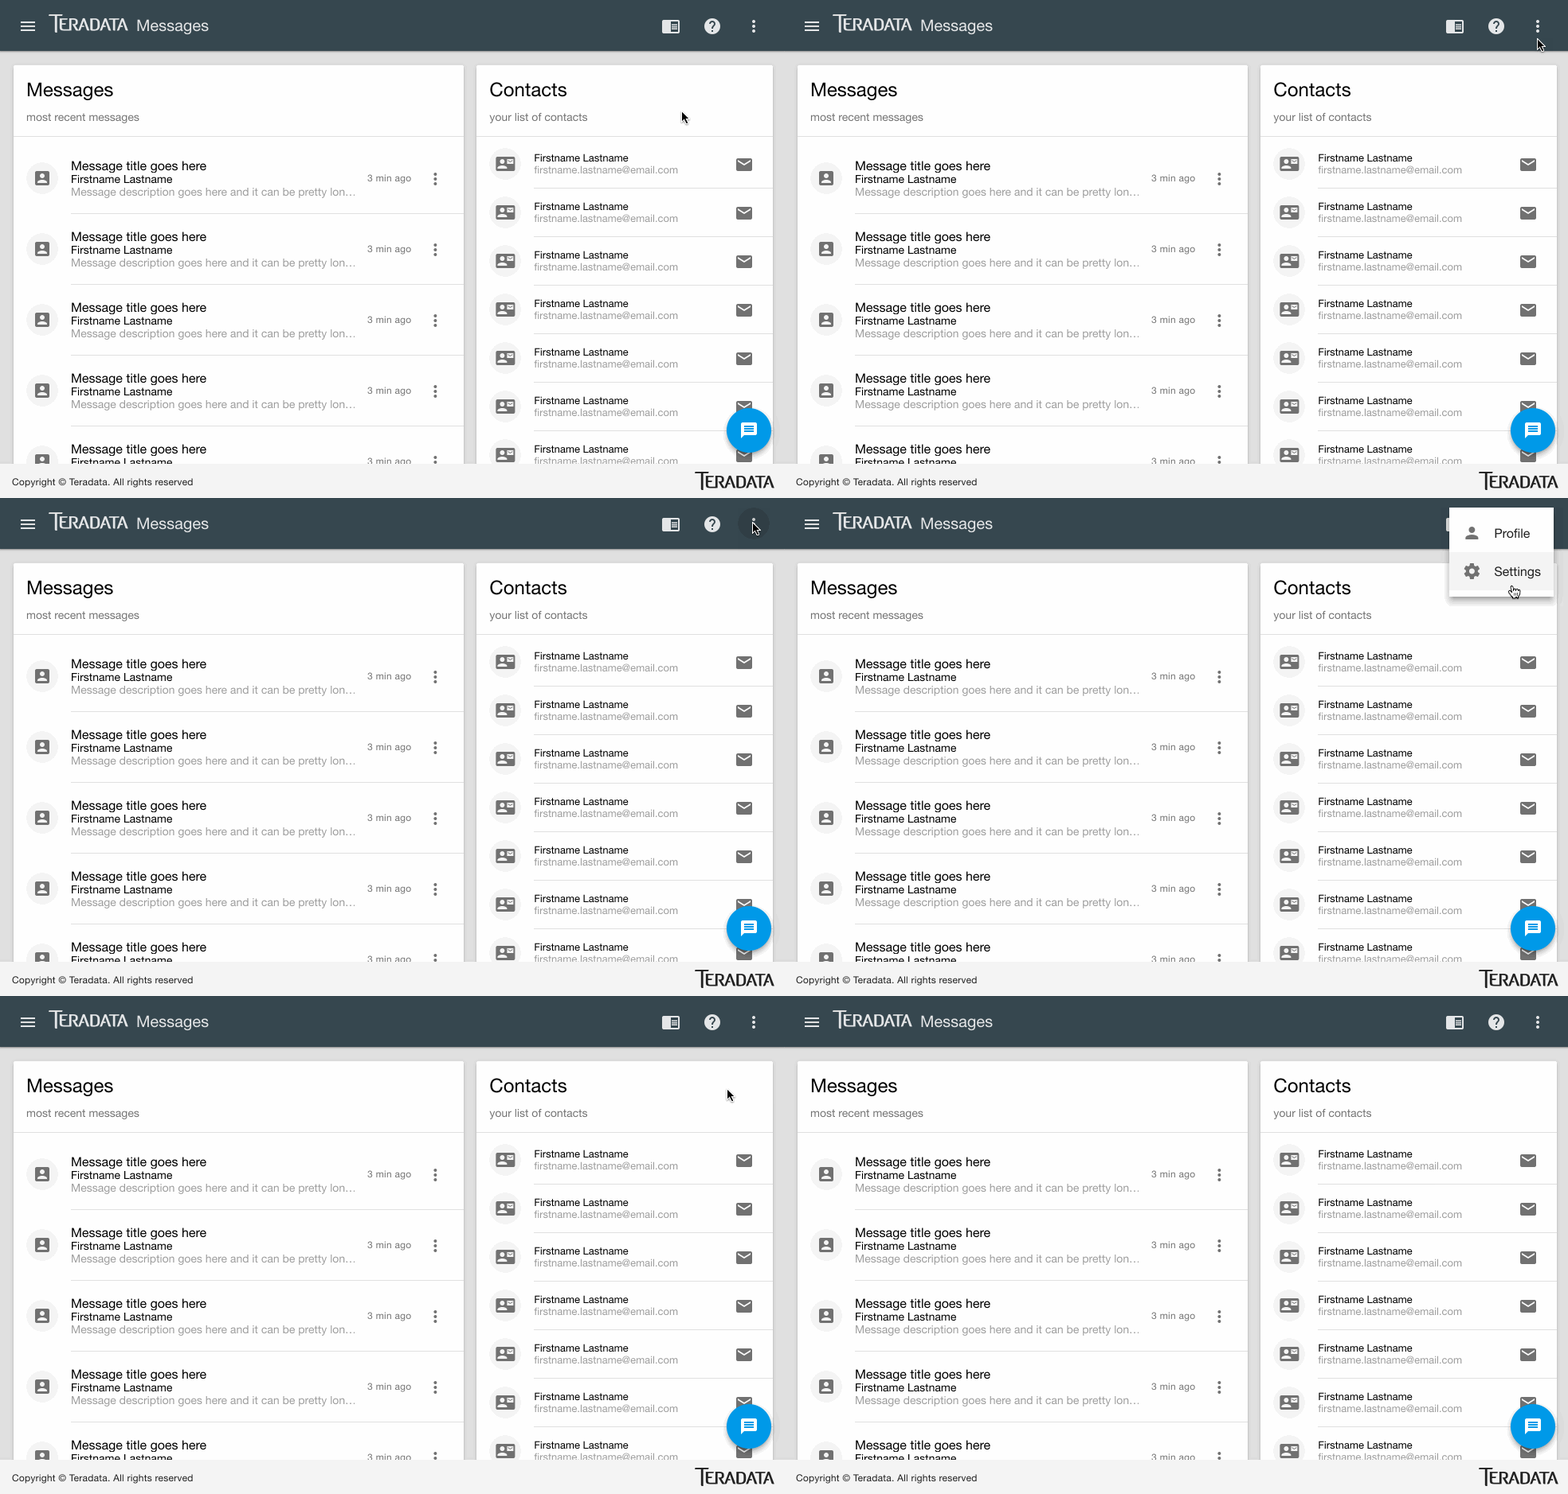
Our toolbar should have two icons on the right side now in both the overview and systems views.

Let's add one more thing to the component—a drop down menu for user profile and settings. In toolbar.component.html, add a <span> element with a <button> for an <md-icon> with a <md-menu>. See the Covalent docs on angular material menus: https://teradata.github.io/covalent/\#/components/material-components
<span flex></span>
<a md-icon-button mdTooltip="Docs"><md-icon>chrome_reader_mode</md-icon></a>
<a md-icon-button mdTooltip="Help"><md-icon>help</md-icon></a>
<span>
    <button md-icon-button [md-menu-trigger-for]="menu">
    <md-icon>more_vert</md-icon>
    </button>
    <md-menu x-position="before" #menu="mdMenu">
        <a md-menu-item><md-icon>person</md-icon>Profile</a>
        <a md-menu-item><md-icon>settings</md-icon>Settings</a>
    </md-menu>
</span>

Smart Component: reusable information messaging component
Our messaging app needs a new pattern for surfacing important information to users. We'll build a standard container with common elements that we can configure on the fly depending on different scenarios.
This time let's use the Angular CLI to quickly stub out our component with a single command.
On the command line type:
ng generate component components/info
That will create all the files you need:

In src/app/components/info/info.component.ts, change the selector to td-info:
import { Component, OnInit } from '@angular/core';

@Component({
  selector: 'td-info',
  templateUrl: './info.component.html',
  styleUrls: ['./info.component.scss']
})
export class InfoComponent implements OnInit {

  constructor() { }

  ngOnInit() {
  }

}
Like our toolbar component before, let's make this a "dumb" component first, then we'll make it smart.
<md-card>
  <md-toolbar>
    <span class="td-info-icon">
      <md-icon>info_outline</md-icon>
    </span>
    <span>New tagging feature</span>
    <span flex></span>
    <a md-raised-button color="accent" routerLink="systems">
      <span>Learn more</span>
    </a>
  </md-toolbar>
  <md-card-content>
    <p class="md-body-1">Learn about our new tagging feature that lets you tag and group your messages.</p>
  </md-card-content>
  <md-divider></md-divider>
  <md-card-actions>
    <a md-button href="http://google.com">
      <span>See docs</span>
    </a>
  </md-card-actions>
</md-card>
Now we'll write a bit of css to info.component.scss for icon spacing and then use our new info component in overview component view.
.td-info-icon {
  margin: 0 14px;
  line-height: 15px;
}
...
<div flex-gt-xs="40">
      <td-info></td-info>
      <md-card>
      ...

Now we can start adding in property bindings with @Input
import { Component, Input } from '@angular/core';

@Component({
  selector: 'td-info',
  templateUrl: './info.component.html',
  styleUrls: ['./info.component.scss']
})
export class InfoComponent {

  @Input() infoTitle: string;

}
We're adding @Input() infoTitle: string; as a property binding so that we can dynamically change what the title of the info message is.
...
<span *ngIf="infoTitle">{{infoTitle}}</span>
...
Let's add that property to the markup in our view:
<td-info infoTitle="New tagging feature"></td-info>
Now we can add these property bindings to routerLinks, colors, text, and icons.
import { Component, Input } from '@angular/core';

@Component({
  selector: 'td-info',
  templateUrl: './info.component.html',
  styleUrls: ['./info.component.scss']
})
export class InfoComponent {

  /**
   * infoTitle: string
   *
   * The title set in toolbar.
   */
  @Input() infoTitle: string;

  /**
   * icon: string
   *
   * The icon name to be displayed before the title.
   * Defaults to info_outline icon
   */
  @Input() icon: string = 'info_outline';

  /**
   * iconColor?: string
   *
   * The optioinal icon color to be displayed before the title.
   */
  @Input() iconColor: string;

  /**
   * info?: string
   *
   * The optional string content of the info body.
   */
  @Input() info: string;

  /**
   * actionPrimary?: string
   *
   * The optional route for primary action button.
   */
  @Input() actionPrimary: string;

  /**
   * actionPrimaryText?: string
   *
   * The optional text for primary action button.
   */
  @Input() actionPrimaryText: string;

  /**
   * actionPrimaryColor?: string
   *
   * The optional background color for primary action button.
   */
  @Input() actionPrimaryColor: string;

}
<md-card>
  <md-toolbar>
    <span class="td-info-icon" *ngIf="icon">
      <md-icon ngClass="{{iconColor}}">{{icon}}</md-icon>
    </span>
    <span *ngIf="infoTitle">{{infoTitle}}</span>
    <span flex></span>
    <a md-raised-button color="{{actionPrimaryColor}}" *ngIf="actionPrimary && actionPrimaryText" [routerLink]="actionPrimary">
      <span>{{actionPrimaryText}}</span>
    </a>
  </md-toolbar>
  <md-card-content>
    <p class="md-body-1" *ngIf="info">{{info}}</p>
  </md-card-content>
  <md-divider></md-divider>
  <md-card-actions>
    <a md-button href="http://google.com">
      <span>See docs</span>
    </a>
  </md-card-actions>
</md-card>
      <td-info
        infoTitle="New tagging feature"
        iconColor="tc-blue-500"
        info="Learn about our new tagging feature that lets you tag and group your messages."
        actionPrimary="systems"
        actionPrimaryText="Read More"
        actionPrimaryColor="accent">
      </td-info>